
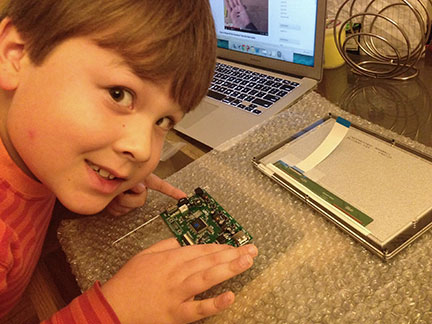
C follows along with the video on putting together our HMDIPi. Here he’s holding the screen driver.
What could be more seasonally appropriate for Thanksgiving than putting together a pi-squared activity: completing our planned mashup of HDMIPi meets Kano while waiting for our pumpkin pie to bake in the oven.
It’s been the subject of some anticipation since our HDMIPi kit arrived from Cyntech, but an around-the-world work trip intervened. Now back home, the proof of whether we could put everything together would be in the pi.
At first, the most fun part for my seven-year-old was removing the protective covering from the perspex. One of the nice options is that you can choose from various colours for the casing, so customizing your Pi is part of the deal.
He wasn’t daunted as we got into the more complex business of attaching the screen cable and screen driver. (I venture to add he was far more confident than I at times!)
While checking on the state of the pie-in-oven, I worried about whether the RaspberryPi we had would fit with all slots accessible — the external speaker, the wifi dongle, the wireless keyboard, the USB slot. Could we actually make our vision of a “PiPad” a reality?
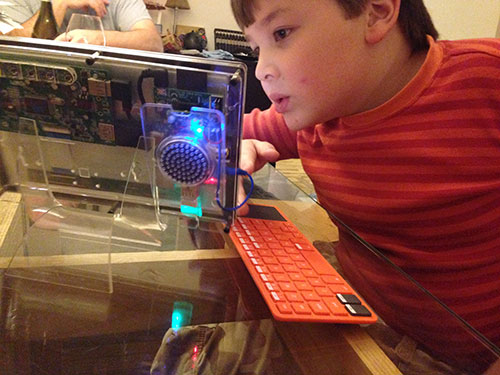
We chose a see-through perspex backplate and love that all the ‘guts’ of our PiPad are visible. You can see the rear-mounted external speaker.
I reasoned that even if we ended up having to rear mount or otherwise connect the entire RaspberryPi, the amazing screen experience would more than make up for the lack of a slickly integrated solution. But I was about to be pleasantly surprised.
With the front of the screen put together, it was time to mount the Pi. The HDMIPi video on assembly makes this entire process quite simple. Yes, even a seven-year-old can do it…with some parental assistance :0) The anxiety was a let down as the thoughtfully constructed backplate made it all quite easy to fit our existing Pi with all ports easily accessible. We ended up rear mounting the external speaker and then sat back to experience the high definition.
The clear backplate is a winner as it reveals the guts of it all, and it’s been rewarding to see our son explain what’s what to impressed adults for whom the inner workings of a computer have always been a black box mystery. There is also empowerment in the very process of having constructed your own computer!
We had initially connected our Pi to our flatscreen TV and some resolution issues made navigating the menu tricky. The large screen format experience wasn’t all that. Ironically, some of the colours seemed flat. By contrast, the HDMIPi screen provides an incredibly rich viewing experience. Videos literally look brilliant and it is super easy to adjust the resolution for applications like Scratch.

The PiPad turned out brilliantly. The pie… not so much!
The result was that our son is enthusiastically carting his PiPad around and getting into Snake, Pong and more. The visual quality, plus the portability and incredibly classy and slick form factor are a winning combination. The PiPad is a reality and we love it. (Thus removing quotation marks around piPad.) Sadly, we were so engaged with the PiPad that we neglected the other pie with a… browned and smoky result. Ah well, it was worth it!
So… two people we have a huge shout out to this Thanksgiving are: James Cranwell-Ward (see the amazing work he’s doing with the RaspberryPi for learning) and Dave Mellor (get your own HDMIPi here!)
No responses yet